简介
OpenAPI 规范是一种与语言无关的定义格式,用于描述 RESTful API。Nest 提供了一个专用的模块,通过利用装饰器来生成此类规范。
安装
要开始使用它,我们首先安装所需的依赖。
$ npm install --save @nestjs/swagger引导
安装过程完成后,打开 main.ts 文件并使用 SwaggerModule 类初始化 Swagger:
import { NestFactory } from '@nestjs/core';
import { SwaggerModule, DocumentBuilder } from '@nestjs/swagger';
import { AppModule } from './app.module';

async function bootstrap() {
  const app = await NestFactory.create(AppModule);

  const config = new DocumentBuilder()
    .setTitle('Cats example')
    .setDescription('The cats API description')
    .setVersion('1.0')
    .addTag('cats')
    .build();
  const documentFactory = () => SwaggerModule.createDocument(app, config);
  SwaggerModule.setup('api', app, documentFactory);

  await app.listen(process.env.PORT ?? 3000);
}
bootstrap();
提示
工厂方法 SwaggerModule.createDocument() 专门用于在你请求时生成 Swagger 文档。这种方式有助于节省一些初始化时间,生成的文档是一个符合 OpenAPI Document 规范的可序列化对象。除了通过 HTTP 提供文档外,你还可以将其保存为 JSON 或 YAML 文件,并以各种方式使用。
DocumentBuilder 帮助构建一个符合 OpenAPI 规范的基础文档。它提供了多个方法,用于设置标题、描述、版本等属性。为了创建一个完整的文档(包含所有已定义的 HTTP 路由),我们使用 SwaggerModule 类的 createDocument() 方法。此方法接受两个参数:一个应用实例和一个 Swagger 选项对象。或者,我们可以提供第三个参数,其类型应为 SwaggerDocumentOptions。更多信息请参阅 Document options 部分。
创建文档后,我们可以调用 setup() 方法。它接受以下参数:
- 挂载 Swagger UI 的路径
- 应用实例
- 上面实例化的文档对象
- 可选的配置参数(详情请参阅此处)
现在你可以运行以下命令来启动 HTTP 服务器:
$ npm run start应用运行时,打开浏览器并导航到 http://localhost:3000/api。你应该可以看到 Swagger UI。
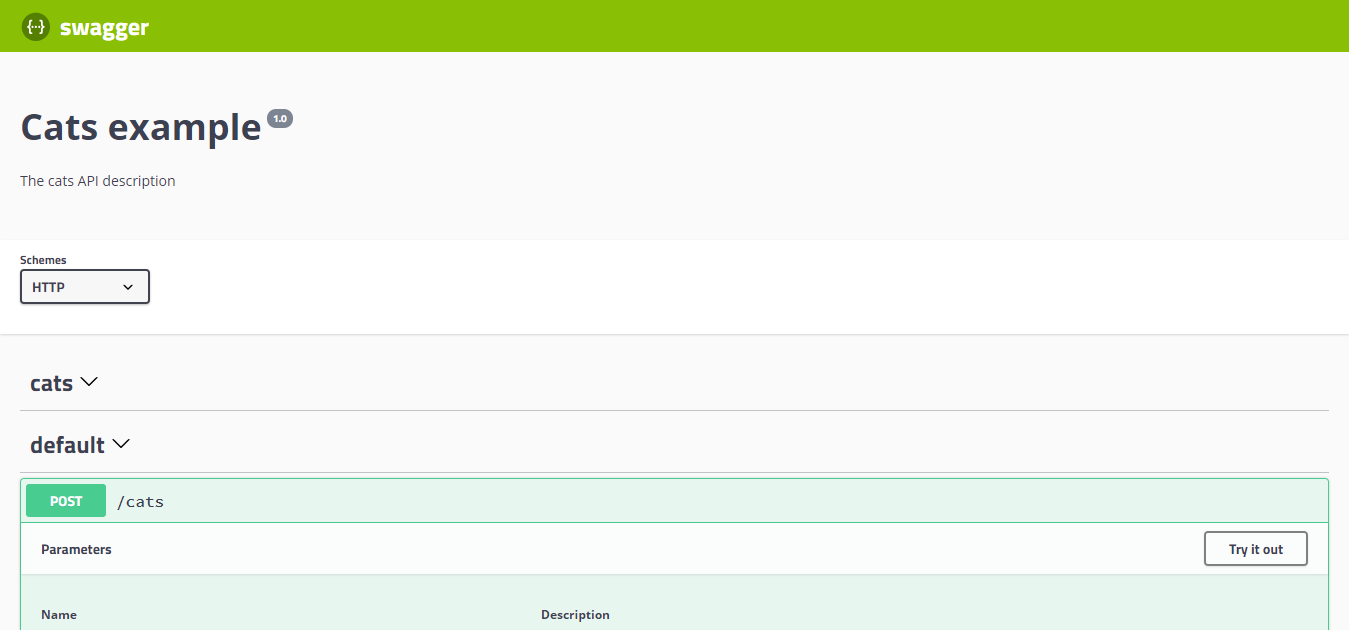
如你所见,SwaggerModule 自动反映了你的所有端点。
提示
要生成并下载 Swagger JSON 文件,请导航到 http://localhost:3000/api-json(假设你的 Swagger 文档在 http://localhost:3000/api 下可用)。 也可以仅使用 @nestjs/swagger 的 setup 方法将其暴露在你选择的路由上,如下所示:
SwaggerModule.setup('swagger', app, documentFactory, {
  jsonDocumentUrl: 'swagger/json',
});
这将在 http://localhost:3000/swagger/json 上暴露它。
警告
当同时使用 fastify 和 helmet 时,可能会遇到 CSP 问题。要解决此冲突,请按如下所示配置 CSP:
app.register(helmet, {
  contentSecurityPolicy: {
    directives: {
      defaultSrc: [`'self'`],
      styleSrc: [`'self'`, `'unsafe-inline'`],
      imgSrc: [`'self'`, 'data:', 'validator.swagger.io'],
      scriptSrc: [`'self'`, `https: 'unsafe-inline'`],
    },
  },
});

// If you are not going to use CSP at all, you can use this:
app.register(helmet, {
  contentSecurityPolicy: false,
});
文档选项
创建文档时,可以提供一些额外选项来微调库的行为。这些选项的类型应为 SwaggerDocumentOptions,可以包含以下内容:
export interface SwaggerDocumentOptions {
  /**
   * List of modules to include in the specification
   */
  include?: Function[];

  /**
   * Additional, extra models that should be inspected and included in the specification
   */
  extraModels?: Function[];

  /**
   * If `true`, swagger will ignore the global prefix set through `setGlobalPrefix()` method
   */
  ignoreGlobalPrefix?: boolean;

  /**
   * If `true`, swagger will also load routes from the modules imported by `include` modules
   */
  deepScanRoutes?: boolean;

  /**
   * Custom operationIdFactory that will be used to generate the `operationId`
   * based on the `controllerKey`, `methodKey`, and version.
   * @default () => controllerKey_methodKey_version
   */
  operationIdFactory?: OperationIdFactory;

  /**
   * Custom linkNameFactory that will be used to generate the name of links
   * in the `links` field of responses
   *
   * @see [Link objects](https://swagger.io/docs/specification/links/)
   *
   * @default () => `${controllerKey}_${methodKey}_from_${fieldKey}`
   */
  linkNameFactory?: (
    controllerKey: string,
    methodKey: string,
    fieldKey: string
  ) => string;

  /*
   * Generate tags automatically based on the controller name.
   * If `false`, you must use the `@ApiTags()` decorator to define tags.
   * Otherwise, the controller name without the suffix `Controller` will be used.
   * @default true
   */
  autoTagControllers?: boolean;
}
例如,如果你想确保库生成的操作名称类似于 createUser 而不是 UsersController_createUser,你可以进行以下设置:
const options: SwaggerDocumentOptions =  {
  operationIdFactory: (
    controllerKey: string,
    methodKey: string
  ) => methodKey
};
const documentFactory = () => SwaggerModule.createDocument(app, config, options);
设置选项
你可以通过传递一个实现 SwaggerCustomOptions 接口的选项对象作为 SwaggerModule#setup 方法的第四个参数来配置 Swagger UI。
export interface SwaggerCustomOptions {
  /**
   * If `true`, Swagger resources paths will be prefixed by the global prefix set through
   * `setGlobalPrefix()`. Default: `false`.
   * @see /faq/global-prefix
   */
  useGlobalPrefix?: boolean;

  /**
   * If `false`, only API definitions (JSON/YAML) will be served (on `jsonDocumentUrl` and
   * `yamlDocumentUrl`). Swagger UI will not be served. Default: `true` or `undefined`.
   */
  ui?: boolean | undefined;

  /**
   * Defines which raw document formats are served.
   * Pass `['json', 'yaml']` for both, `['json']` or `['yaml']` for one,
   * or `[]` / `false` to disable raw document endpoints.
   *
   * Default: `['json', 'yaml']`.
   */
  raw?: Array<'json' | 'yaml'> | false;

  /**
   * URL to fetch the Swagger JSON document.
   * Default: `<path>-json`, e.g., `api-json` when path is `api`.
   */
  jsonDocumentUrl?: string;

  /**
   * URL to fetch the Swagger YAML document.
   * Default: `<path>-yaml`, e.g., `api-yaml` when path is `api`.
   */
  yamlDocumentUrl?: string;

  /**
   * Hook allowing to alter the Swagger document before being served.
   * It is called after the document has been generated by the library.
   */
  patchDocumentOnRequest?: <TRequest = any, TResponse = any>(
    req: TRequest,
    res: TResponse,
    document: OpenAPIObject
  ) => OpenAPIObject;

  /**
   * URL path of the Swagger UI page. Default: inherited from `setup()` path.
   */
  swaggerUrl?: string;

  /**
   * Custom page title for the Swagger UI.
   */
  customSwaggerUiPath?: string;

  /**
   * Extra Swagger UI options.
   * @see https://swagger.io/docs/open-source-tools/swagger-ui/usage/configuration/
   */
  swaggerOptions?: Record<string, any>;

  /**
   * Custom CSS styles to inject into the Swagger UI page.
   */
  customCss?: string;

  /**
   * URL(s) of custom CSS stylesheets to load in the Swagger UI page.
   */
  customCssUrl?: string | string[];

  /**
   * URL(s) of custom JavaScript files to load in the Swagger UI page.
   */
  customJs?: string | string[];

  /**
   * Custom JavaScript scripts (inline) to inject into the Swagger UI page.
   */
  customJsStr?: string | string[];

  /**
   * Custom favicon URLs for the Swagger UI page.
   */
  customfavIcon?: string;

  /**
   * Custom site title for the Swagger UI HTML page.
   */
  customSiteTitle?: string;

  /**
   * URL pointing to a custom Swagger UI bundle to use instead of the default.
   */
  urls?: string[];

  /**
   * Whether the Swagger Explorer bar is enabled. Default: `false`.
   */
  explorer?: boolean;
}
提示
ui 和 raw 是独立的选项。禁用 Swagger UI(ui: false)不会禁用 API 定义(JSON/YAML)。反之,禁用 API 定义(raw: [])也不会禁用 Swagger UI。
例如,以下配置将禁用 Swagger UI,但仍然允许访问 API 定义:
const options: SwaggerCustomOptions = {
  ui: false,
  raw: ['json'],
};
SwaggerModule.setup('api', app, options);在这种情况下,http://localhost:3000/api-json 仍然可以访问,但 http://localhost:3000/api(Swagger UI)将不可访问。
示例
一个可运行的示例可在此处获取。